Morph Jobs
Morph Job is a graphical interface allows for easy drag and drop ETL functionality, as Morph Jobs are an extension of Amorphic Jobs.
Morph version: 3.1.2 (As of Amorphic 1.11)
Amorphic Morph provides the following capabilities:
- Enhances experience for building jobs.
- Reduces the Job development time.
- Gives better operational efficiency without requiring technical expertise.
- Allows interactive Job design to help you visualize and understand the data flow between data stores.
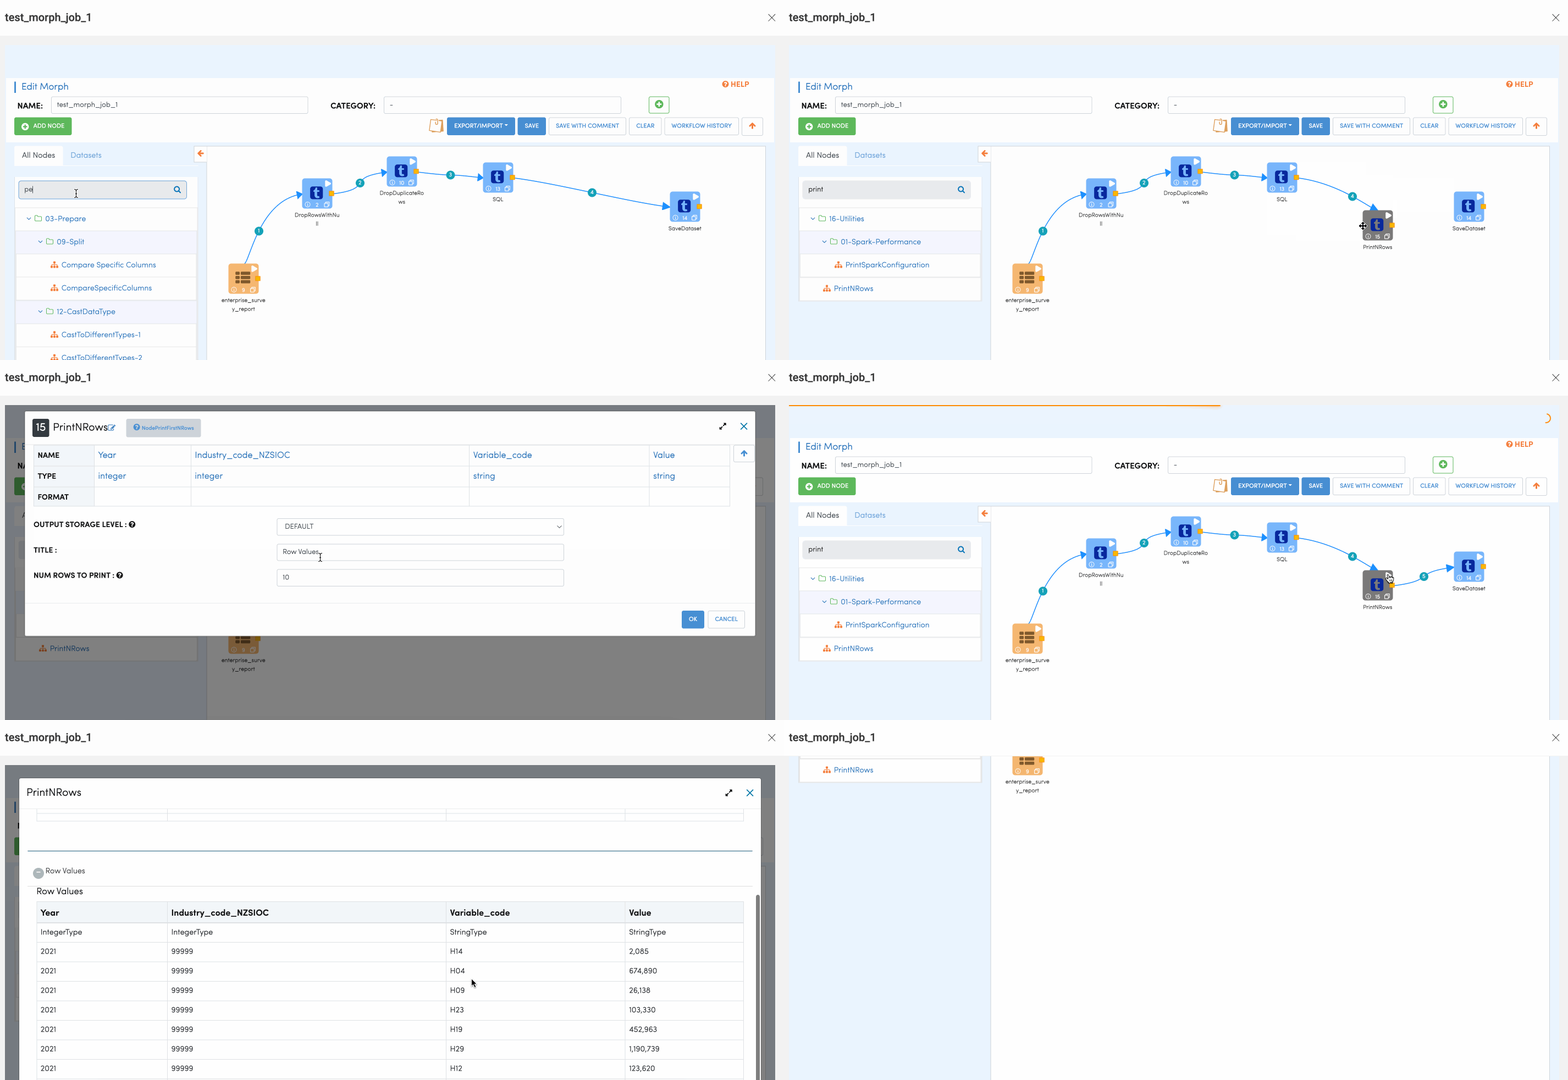
The following picture depicts how a Morph ETL Job looks like in Amorphic:

Building a Morph Job
The following sections describe all the basic CRUD (Create, Read, Update and Delete) operations for building a Morph Job.
- Create Job: Create a new Morph Job.
- View Job: View existing Morph Job
- Update Job: Update an existing Job.
- Run Job: Run an existing Job.
- Restore Job: Restore a Morph Job from a previous version.
- Import and Exporting Jobs: Import and Exporting Jobs between environment.
Create Job
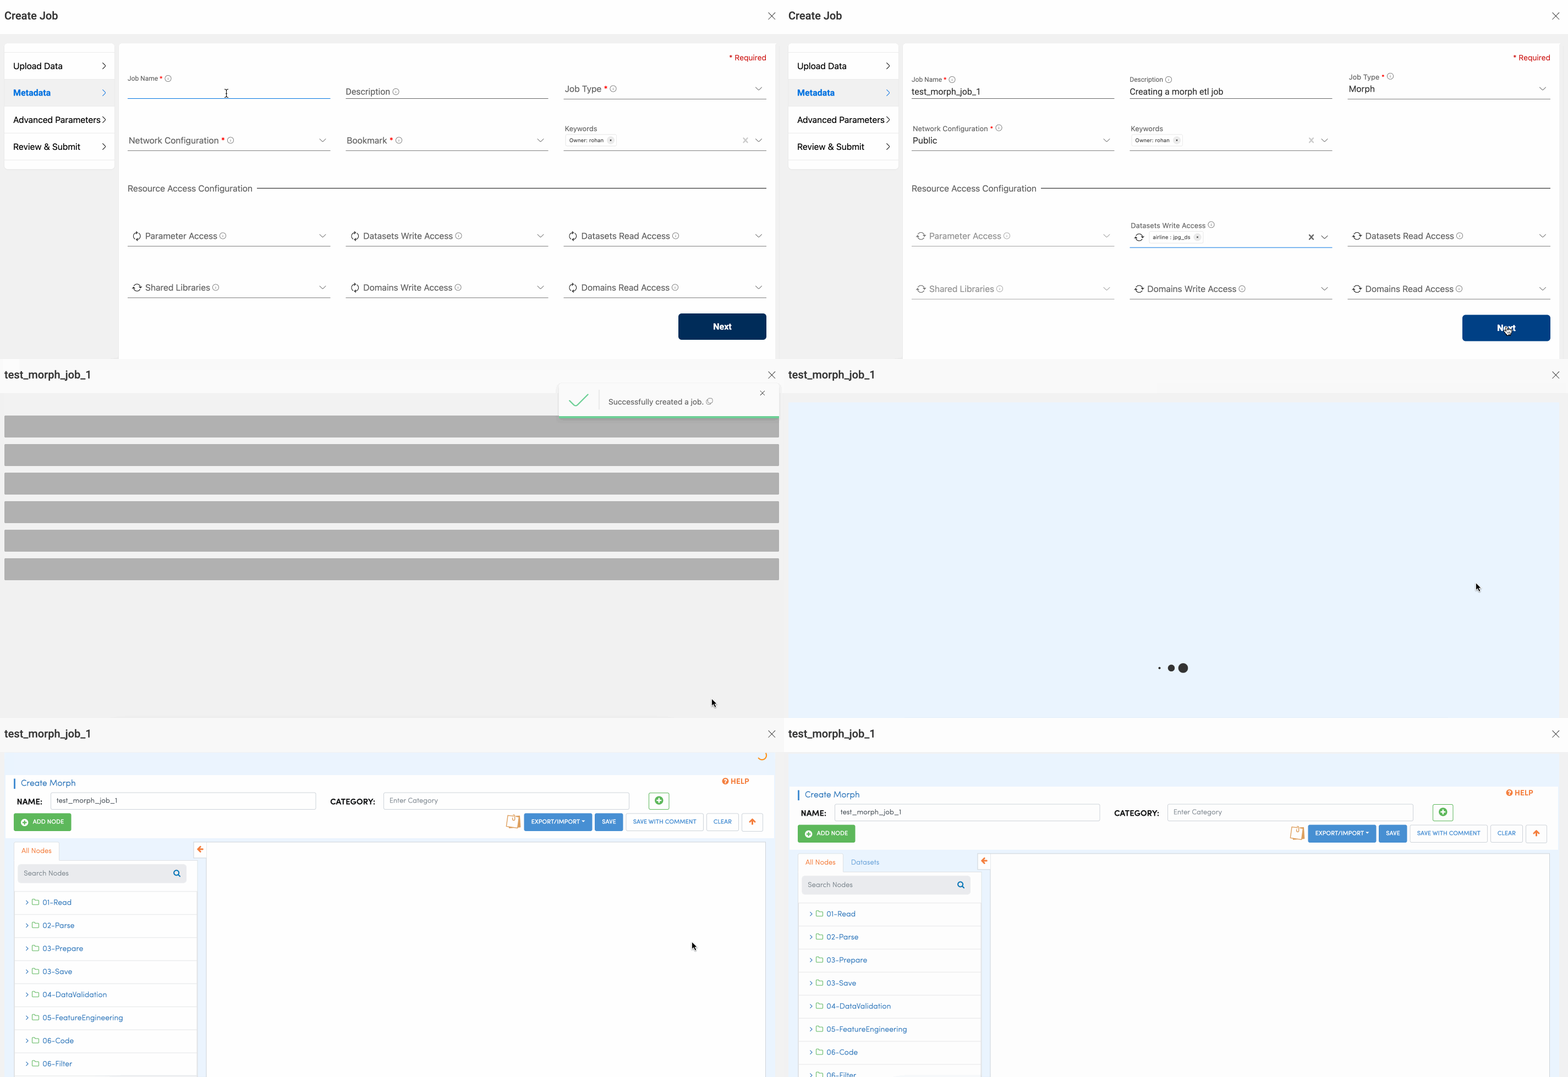
To create a morph job, you have to select the job type Morph while creating a Job.
View Job
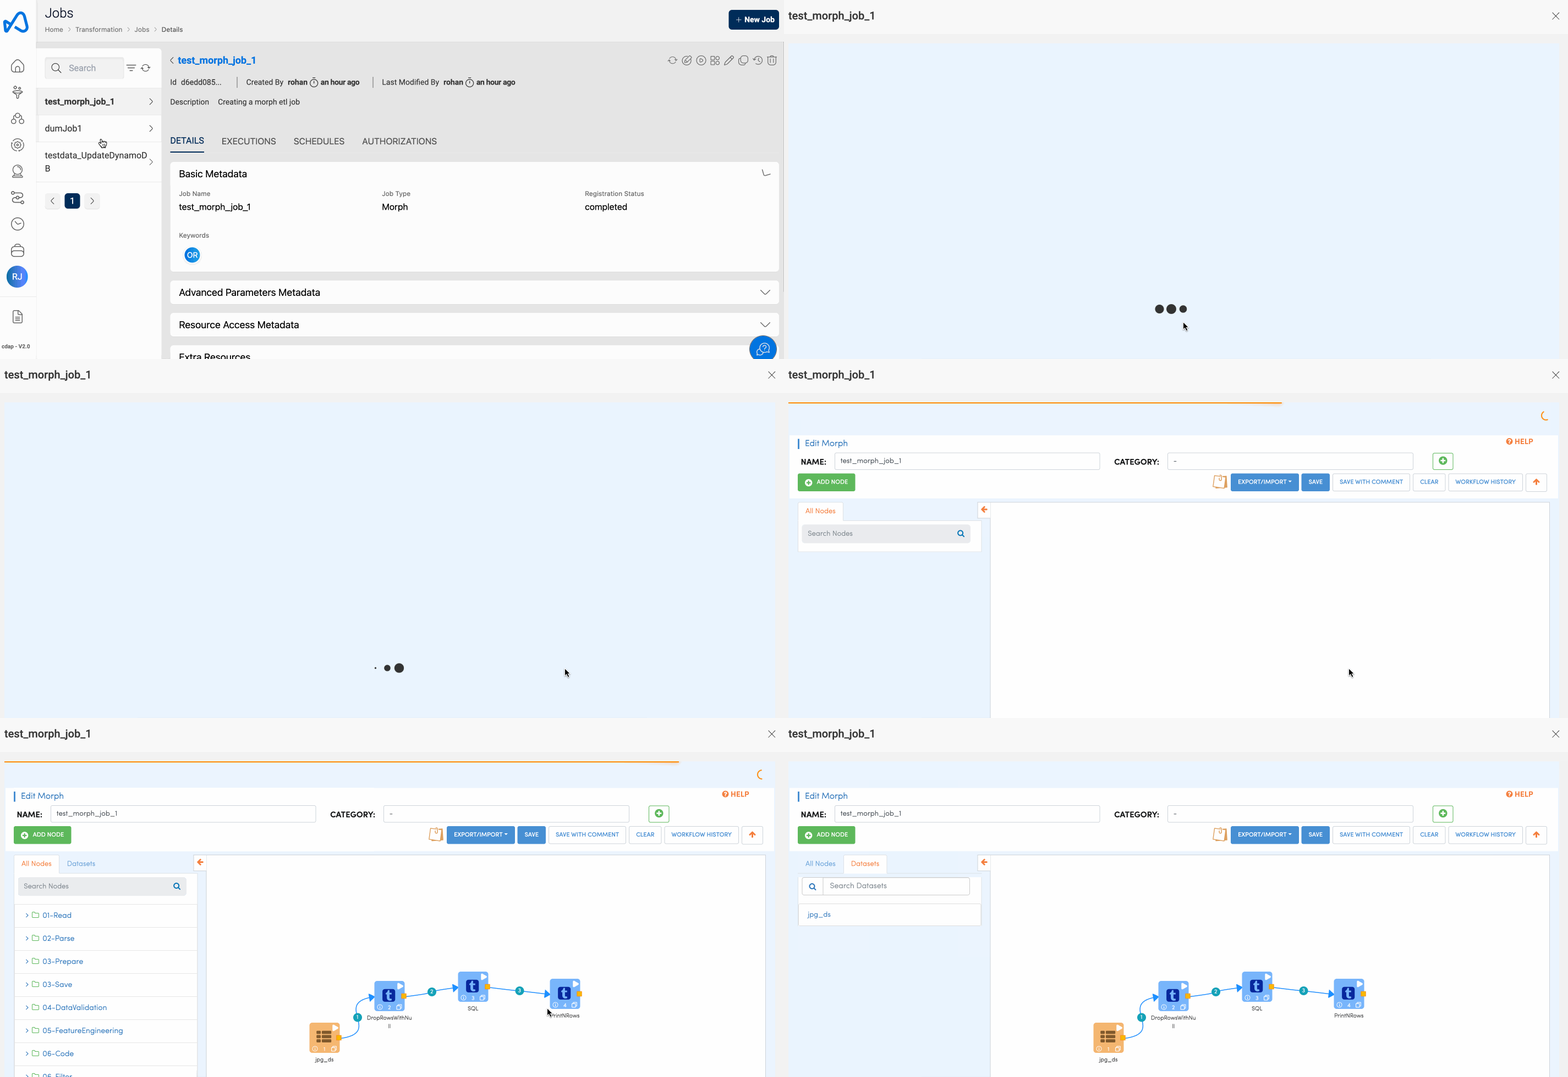
If the user has sufficient permissions to view a Job, user can view all the existing Job information by clicking on the Job name under the “ETL Job” section from the Side Menu. Once you enter the Job details section, Click on the Edit Morph Script from the top right side Actions menu to view the Morph Job.
Please follow the below animation to view the Job information in detail:
Update Job
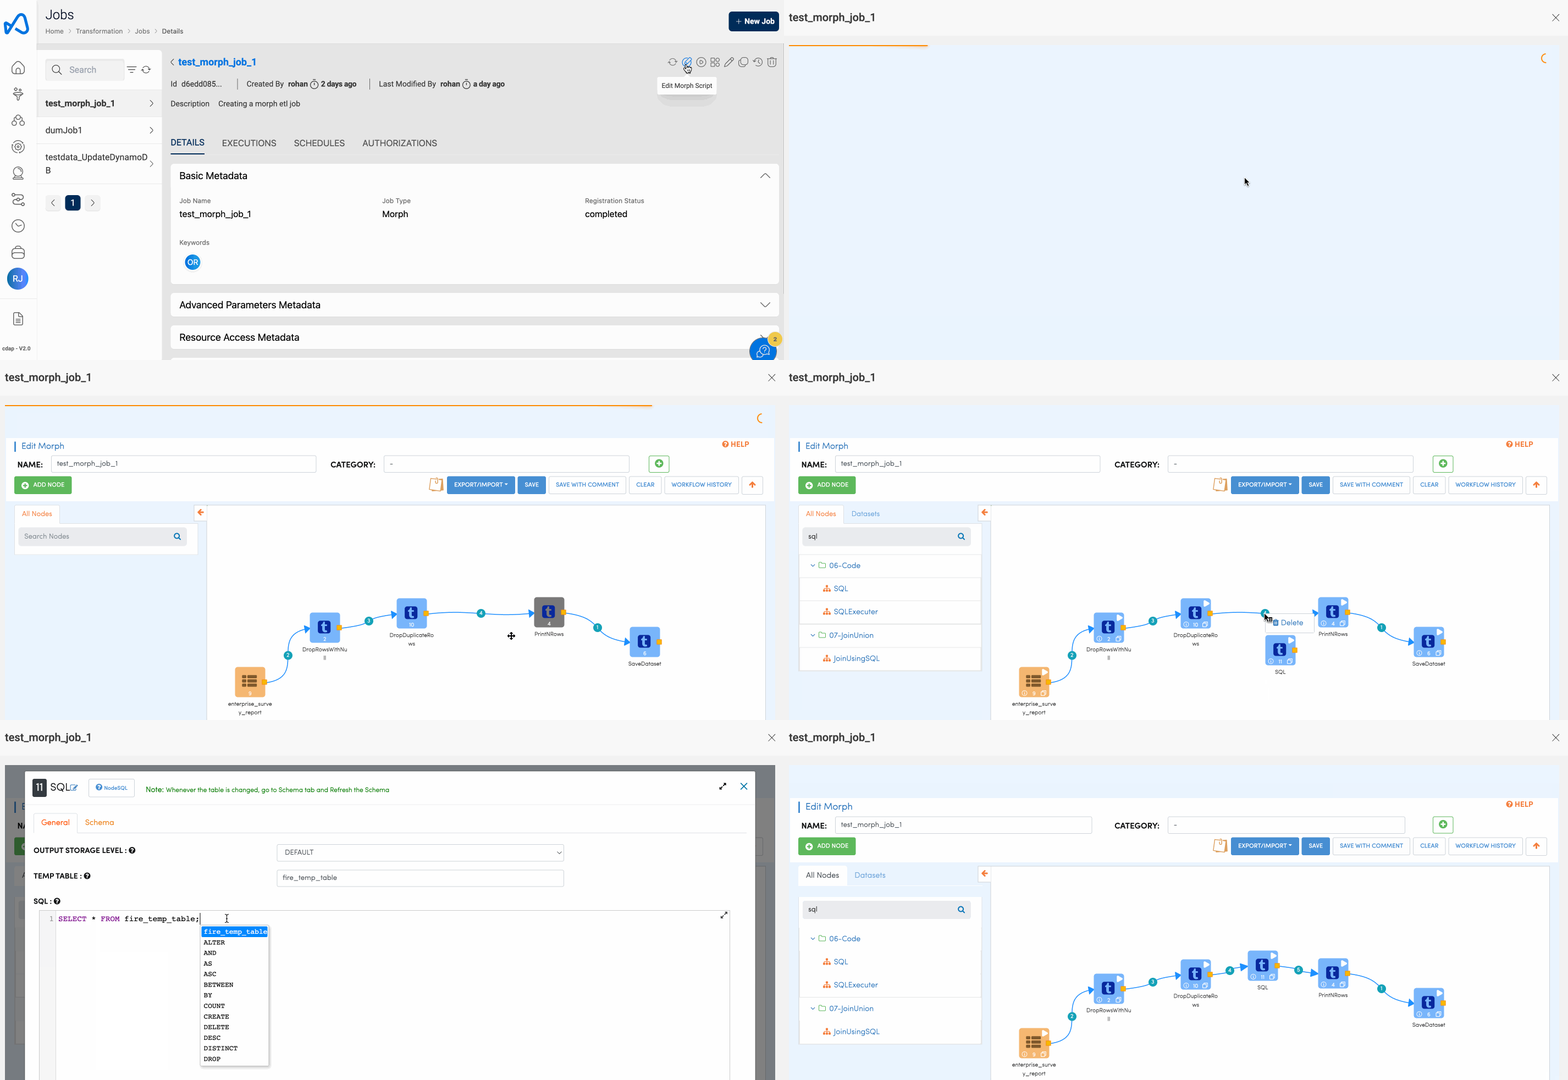
If the user has sufficient permissions to update a Job, user can view all the existing Job information by clicking on the Job Name under the “ETL Job” section from the Side Menu. Basic job details can be updated by clicking on the Edit icon similar to spark and python jobs. For updating the job workflow, user can click on the Edit Morph Script button. This will re-direct you to a different page where you can start editing the job workflow.
Please follow the below animation to update the Job workflow in detail:
Run Job
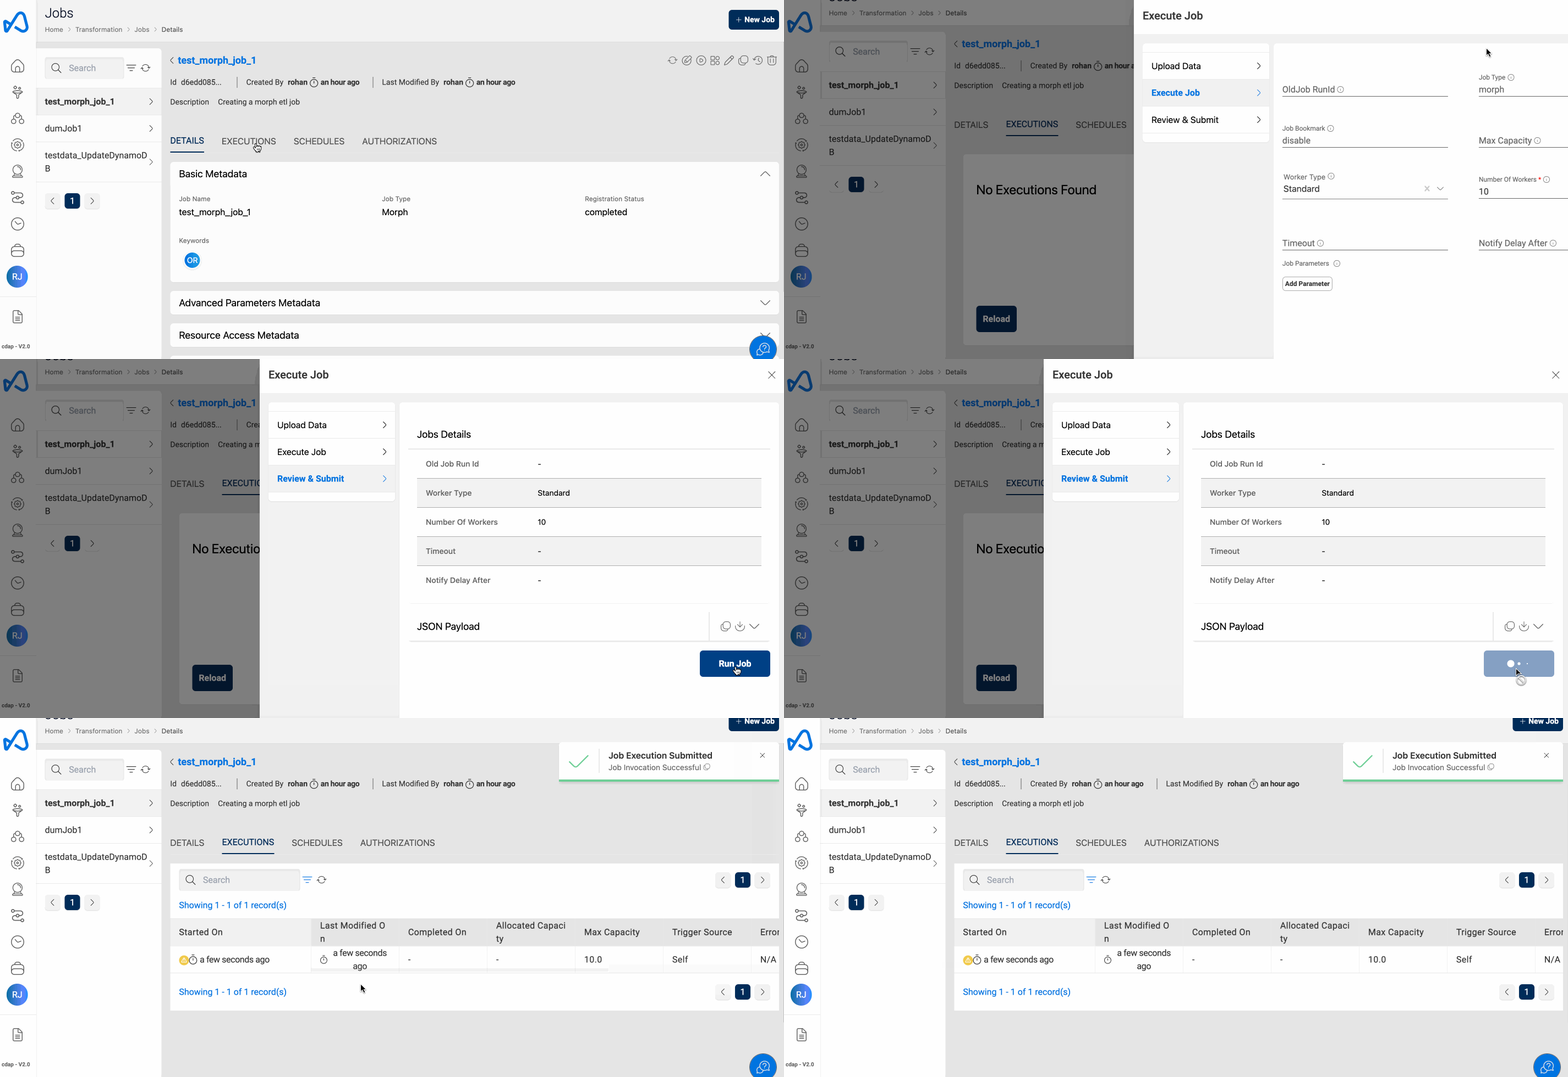
Running a Morph Job, is the same as you do with the traditional ETL Jobs. To execute the ETL Job, click on the Run Job (play icon) button on the top right side of the page. Once a job run is executed, refresh the execution status tab using the Refresh button and check the status.
Restore Job
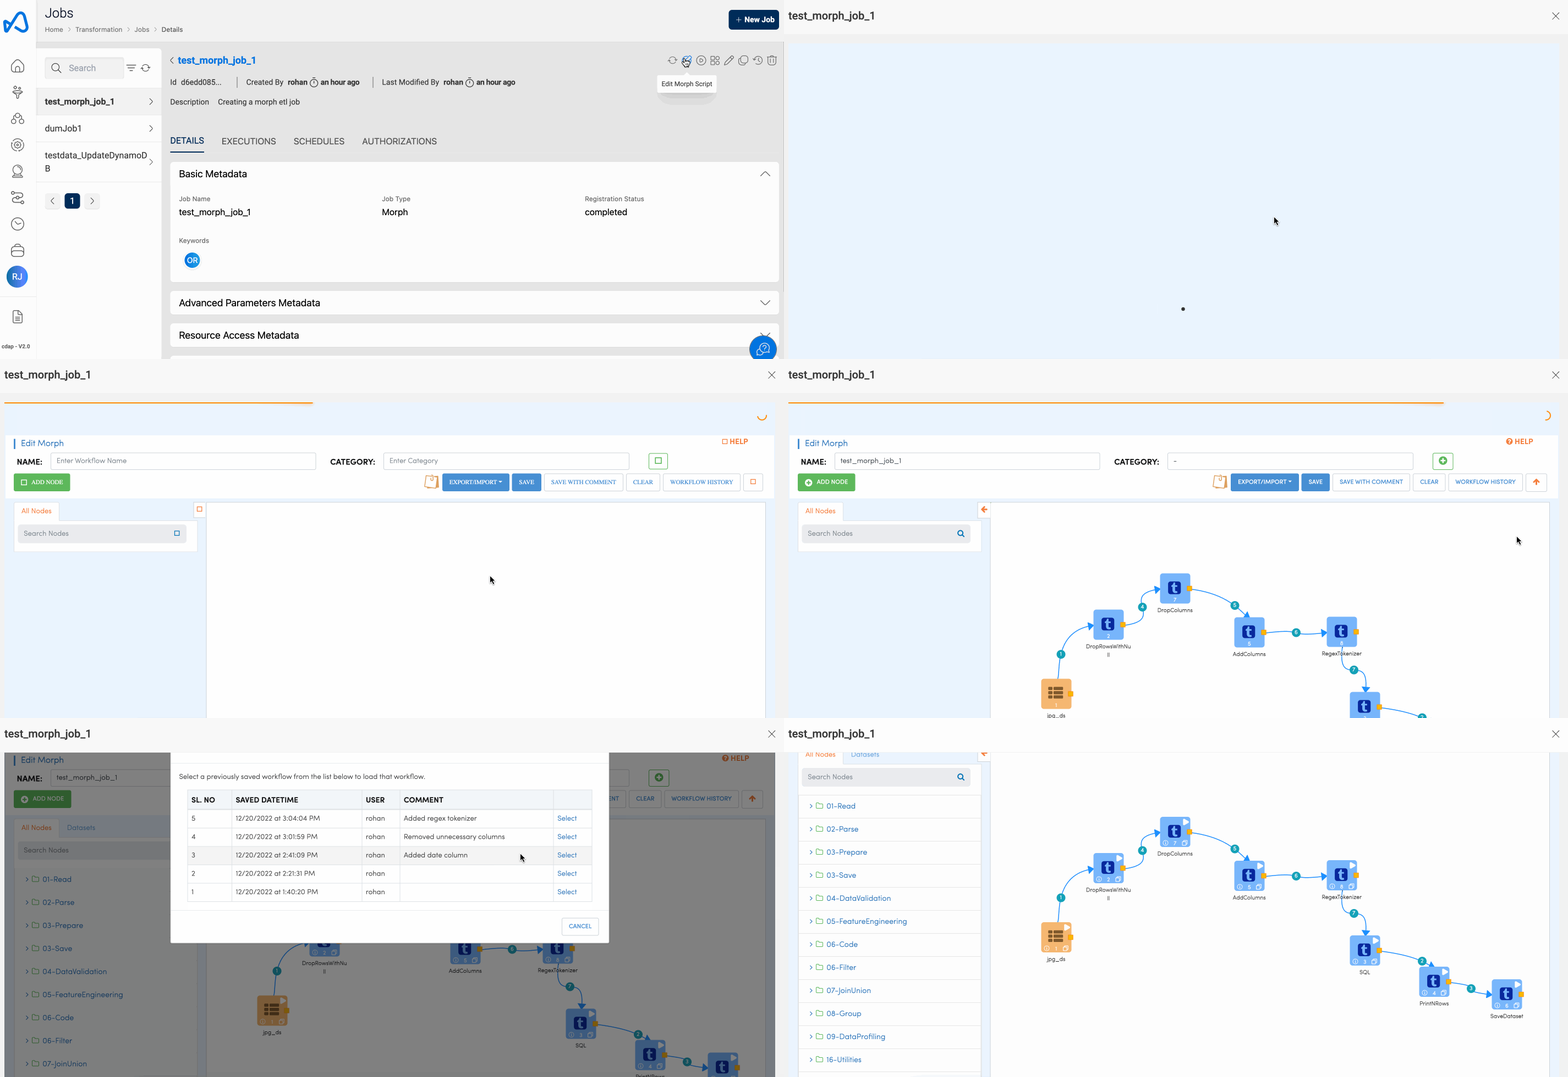
Unlike the traditional ETL jobs offered with Amorphic, Morph supports Job versioning. User can list all edit history, categorizing by user and the time when it was edited. We can do a point in time select and restore a particular version of a job which can be very helpful while recovering from accidental updates.
Please follow the below animation to restore a ETL Job from one of its versions.
Morph backup will be deleted automatically through a lifecycle policy after 28 days.
Import and Exporting Jobs
Morph supports importing and exporting Jobs across multiple environments. Users can now export their development jobs and import them in higher environments after successfully testing their Jobs. Exporting Job lets user to download a json script file with your job configuration, this Json file can be imported in any of the higher environments such as as pre-production or production without having to re-build the entire Morph script.
While importing the jobs in different environments, users should be responsible to make sure you have all the necessary datasets available in the destination environment so that the job can find all the necessary details to execute the job. Once imported, we recommend refreshing each node to make sure the nodes are properly configured and validate previewing of nodes is working fine. This exercise will make sure jobs are properly imported and can be executed without any errors.
Please follow the below animation to import and export a ETL Job.
Exporting Morph Job

Importing Morph Job

Morph Nodes
Morph nodes are the GUI con which allow user to drag-and-drop and perform various operations/transformations on the data read. Please find the detailed purpose of each node
- Read Dataset Node: Read from a Dataset.
- Save Dataset Node: Write to a Dataset.
- SQL Node: Node to Perform SQL operations.
- Print N Rows Node: Preview records coming out of a node.
- Data Manipulation Nodes: Nodes to perform data transformations.
Read Dataset Node
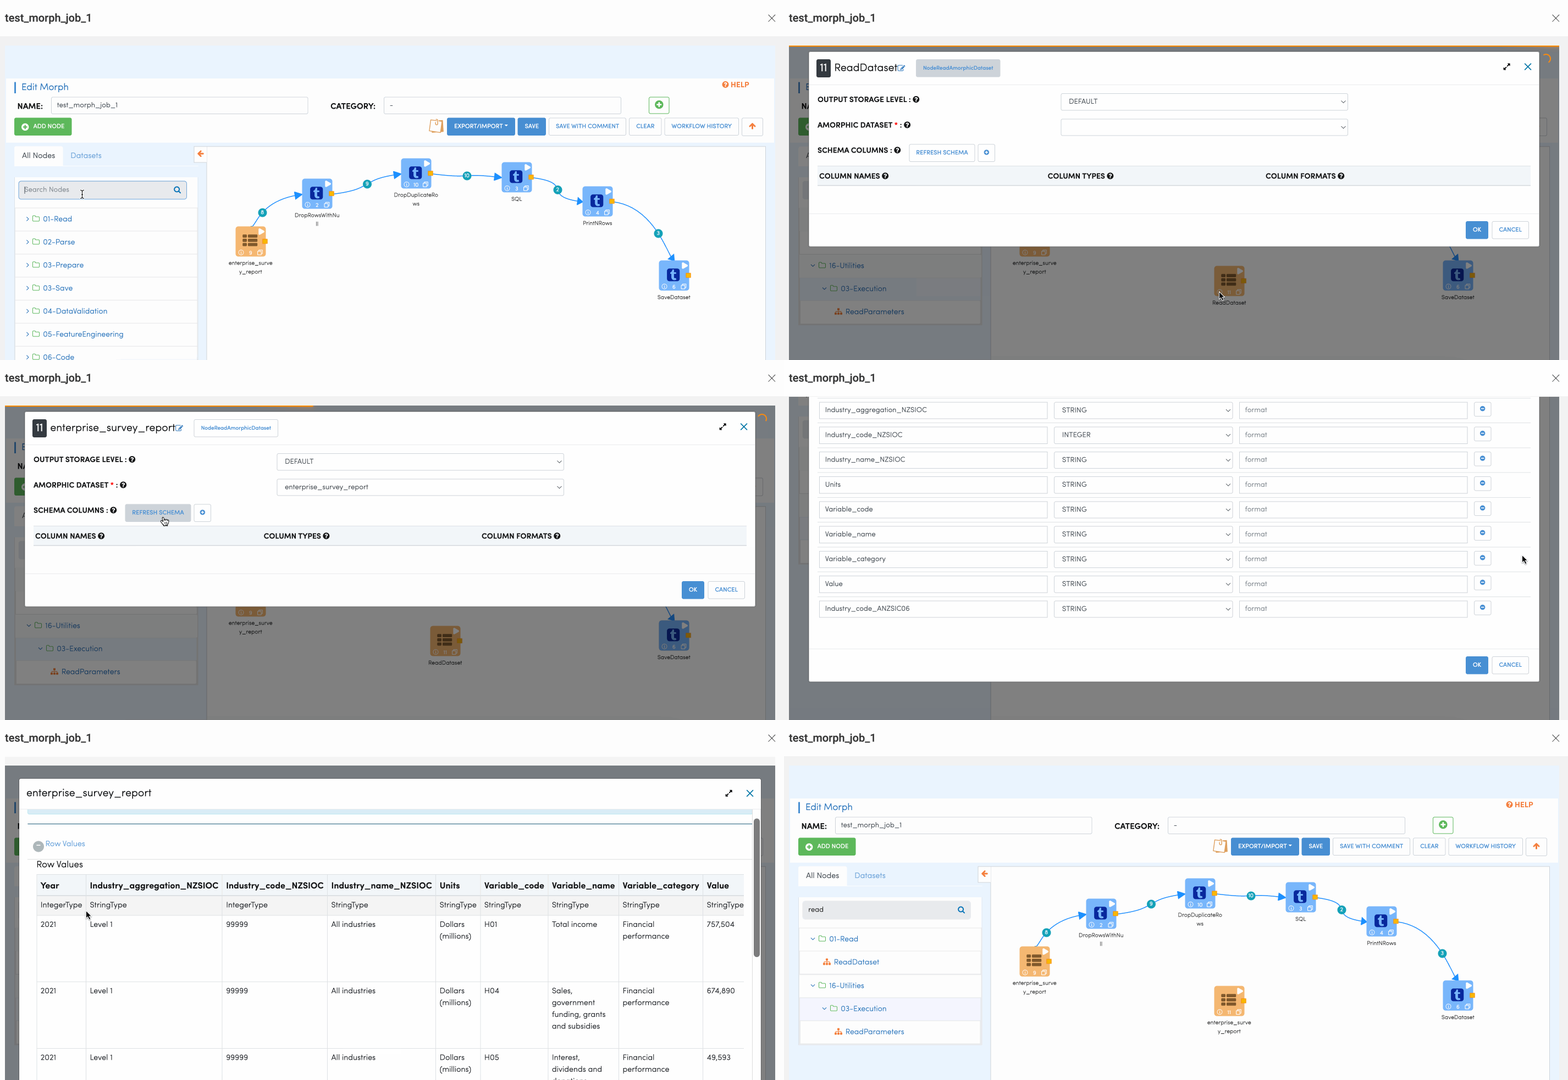
Read Dataset is one of the key nodes to be used for reading Amorphic Datasets. All Datasets selected while registering a job are presented in drop down. User needs to choose the datasets which needs to read as part of the ETL Job. Once you select the dataset, user needs to click on the Refresh Schema button to retrieve its metadata. Reading datasets can be achieved in two ways one is to pick the Read Dataset node and select the dataset which the operations needs to be performed or select the pre-configured node from the Datasets tab. Once the node is properly configured ( Successfully refreshed the schema ) user can preview a subset of records present in the dataset.
For all Read datasets Nodes ( Empty and Pre-configured Node ), User needs to refresh the schema to be able to preview the records first.
Save Dataset Node
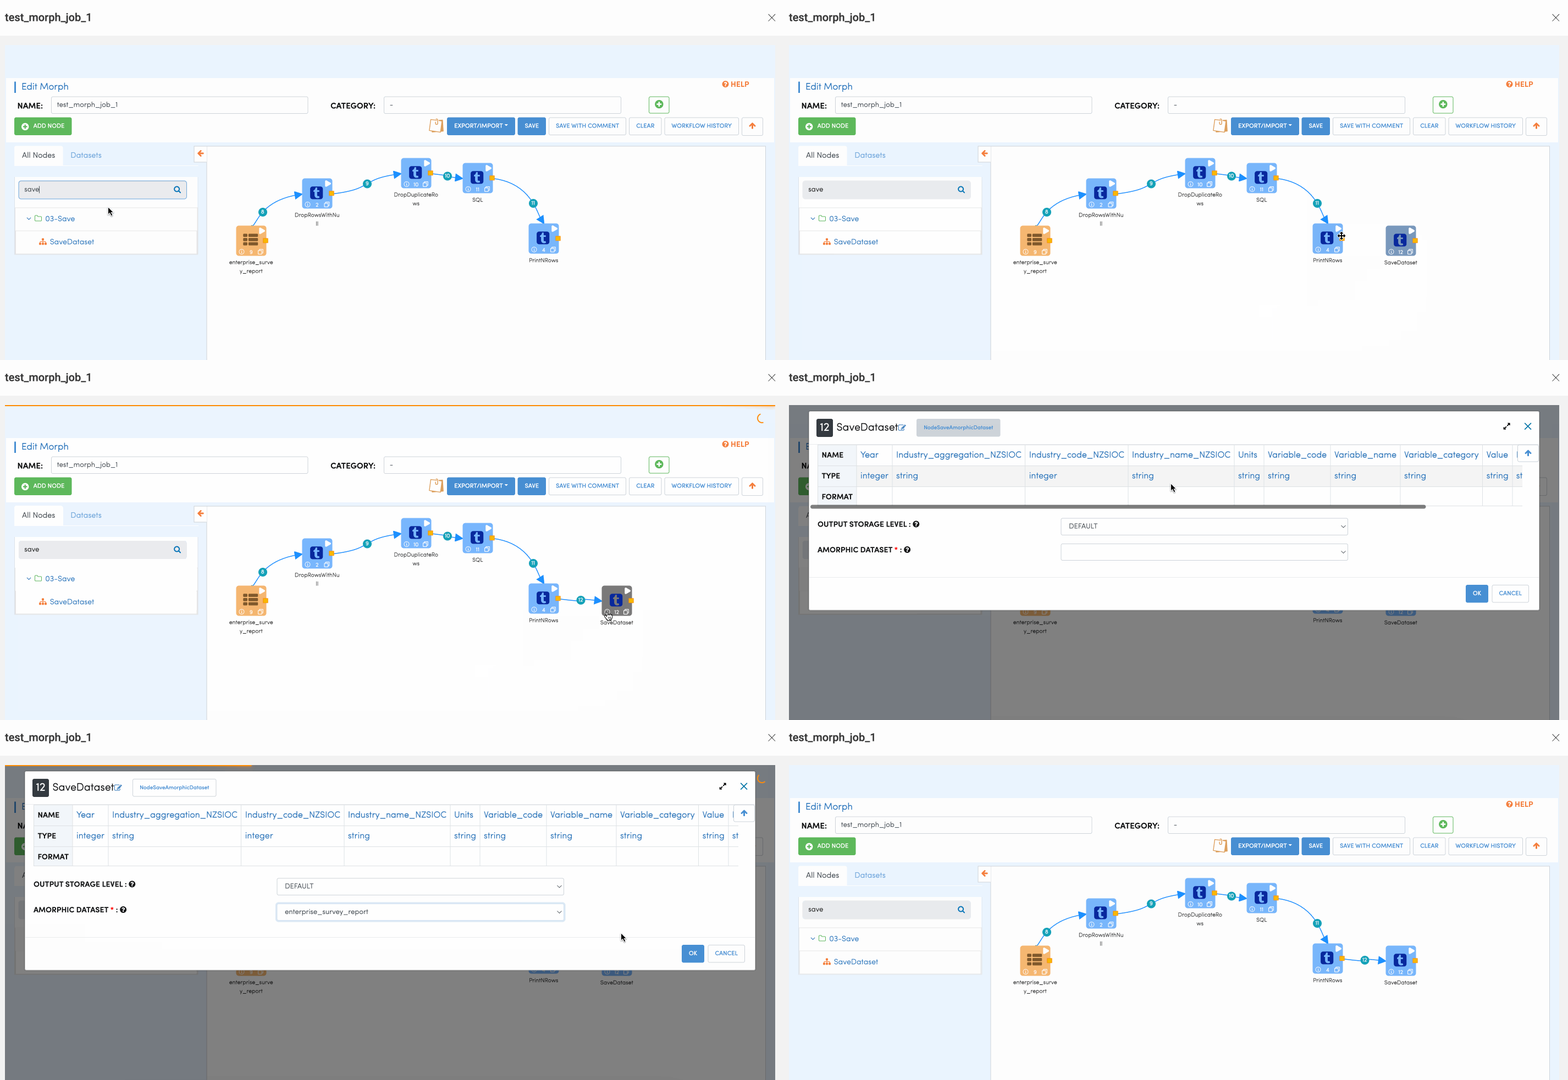
Save Dataset Node is used for writing data records to Amorphic dataset. Similar to Read dataset, User would be presented with drop down where the user can choose to what dataset the output records needs to written to. Please follow the below animation to understand how to configure save node.
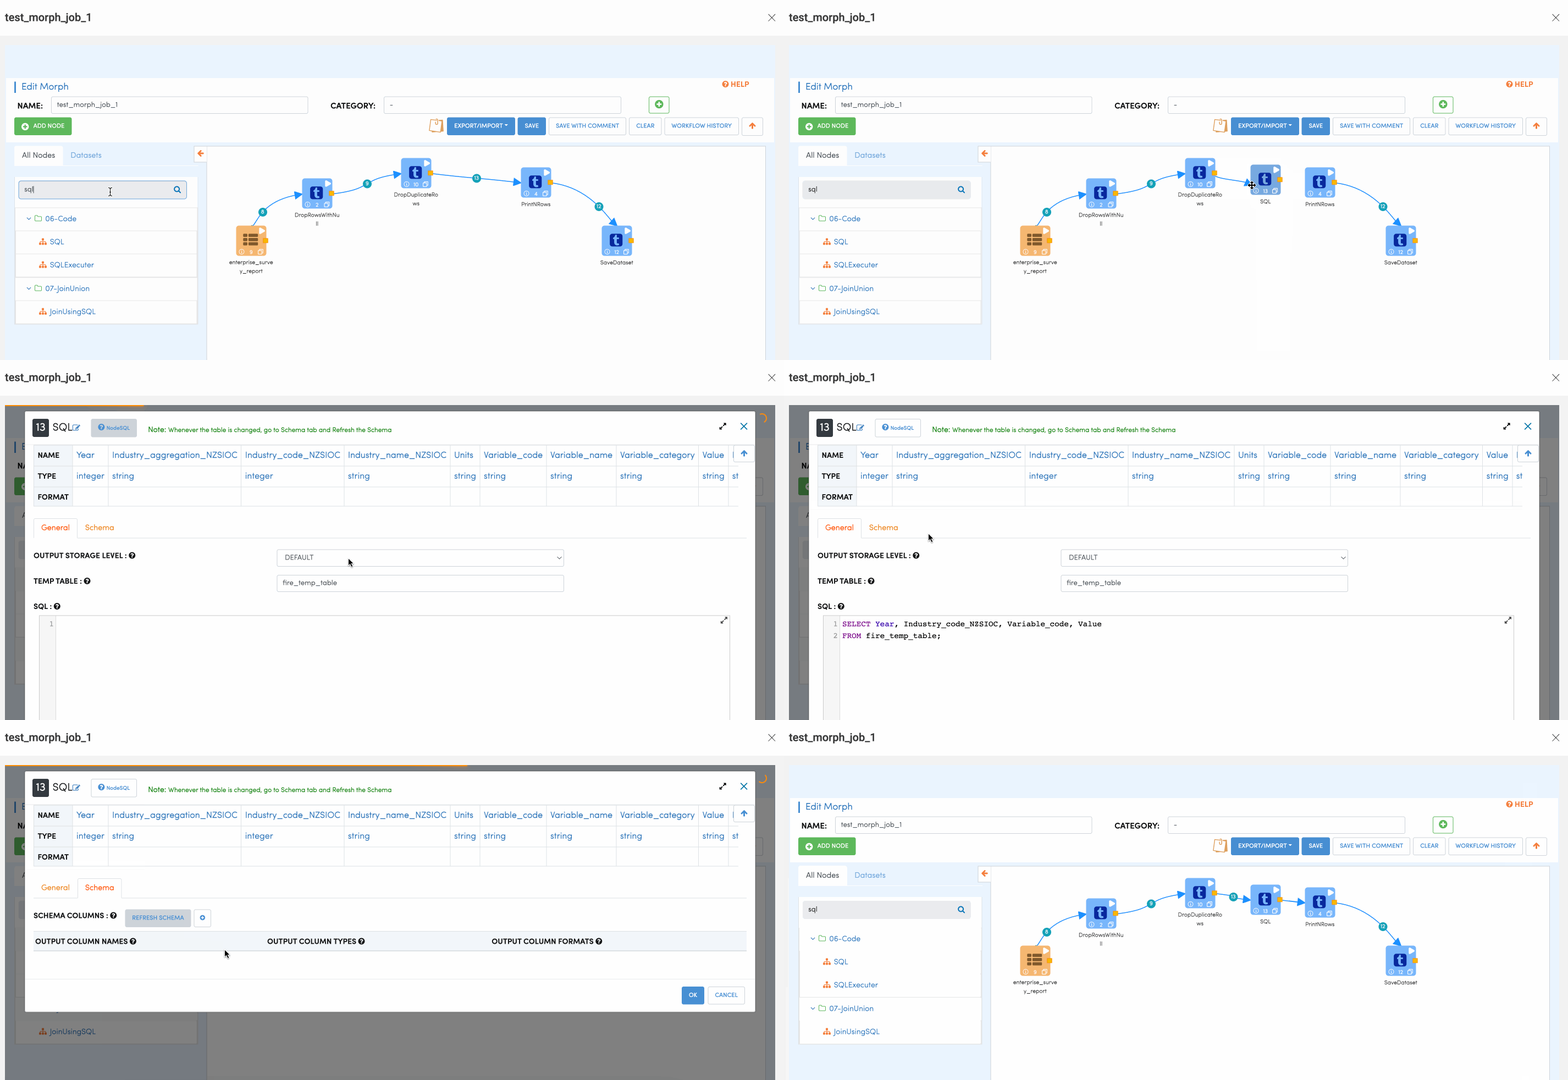
SQL Node
SQL Node is used for performing SQL actions on the dataset. This node allows users to run SQL queries on the data to filter or join other datasets etc.
Once the user writes the SQL query, user also needs to click on the refresh schema button to make sure the SQL is executing fine and allow schema propagation.
Print N Rows Node
Print N rows Node, is utility node which helps user understand what type of data is flowing through the nodes. This helps developer to have a visualization of the data flowing through each node and understand exactly what data is being outputted. This way user can have a clear picture on how the output looks like before running the job which inturn saves a lot of developing time.
