Email Connections
Email connections enable users to seamlessly ingest data sent over emails as attachments, directly into Amorphic Datasets.
How to create an Email Connection?
An email connection can be created using an email address as follows:

Here is a description of all the fields required for creating an Email Connection:
| Attribute | Description |
|---|---|
| Connection Name | Give your connection a unique name. |
| Connection Type | Type of connection, in this case, it is Email. |
| Description | You can describe the connection purpose and important information about the connection. |
| Email Address | Email Address of the recipient. |
| Enable Scan | Enable/Disable this option to scan incoming emails for spam and viruses. This option is disabled by default. |
| Enable TLS | Enable/Disable this option to reject any incoming emails that aren't sent over a secure connection. This option is disabled by default. |
Enable Scan, Enable TLS and Description are the only attributes that are editable after connection creation.
How to verify an Email Connection?
Inorder to successfully verify an email connection, it is essential that the domain used to create the connection has a mail server associated with it. Additionally, the user will need to have access to the DNS settings of the domain inorder to update the DNS records.
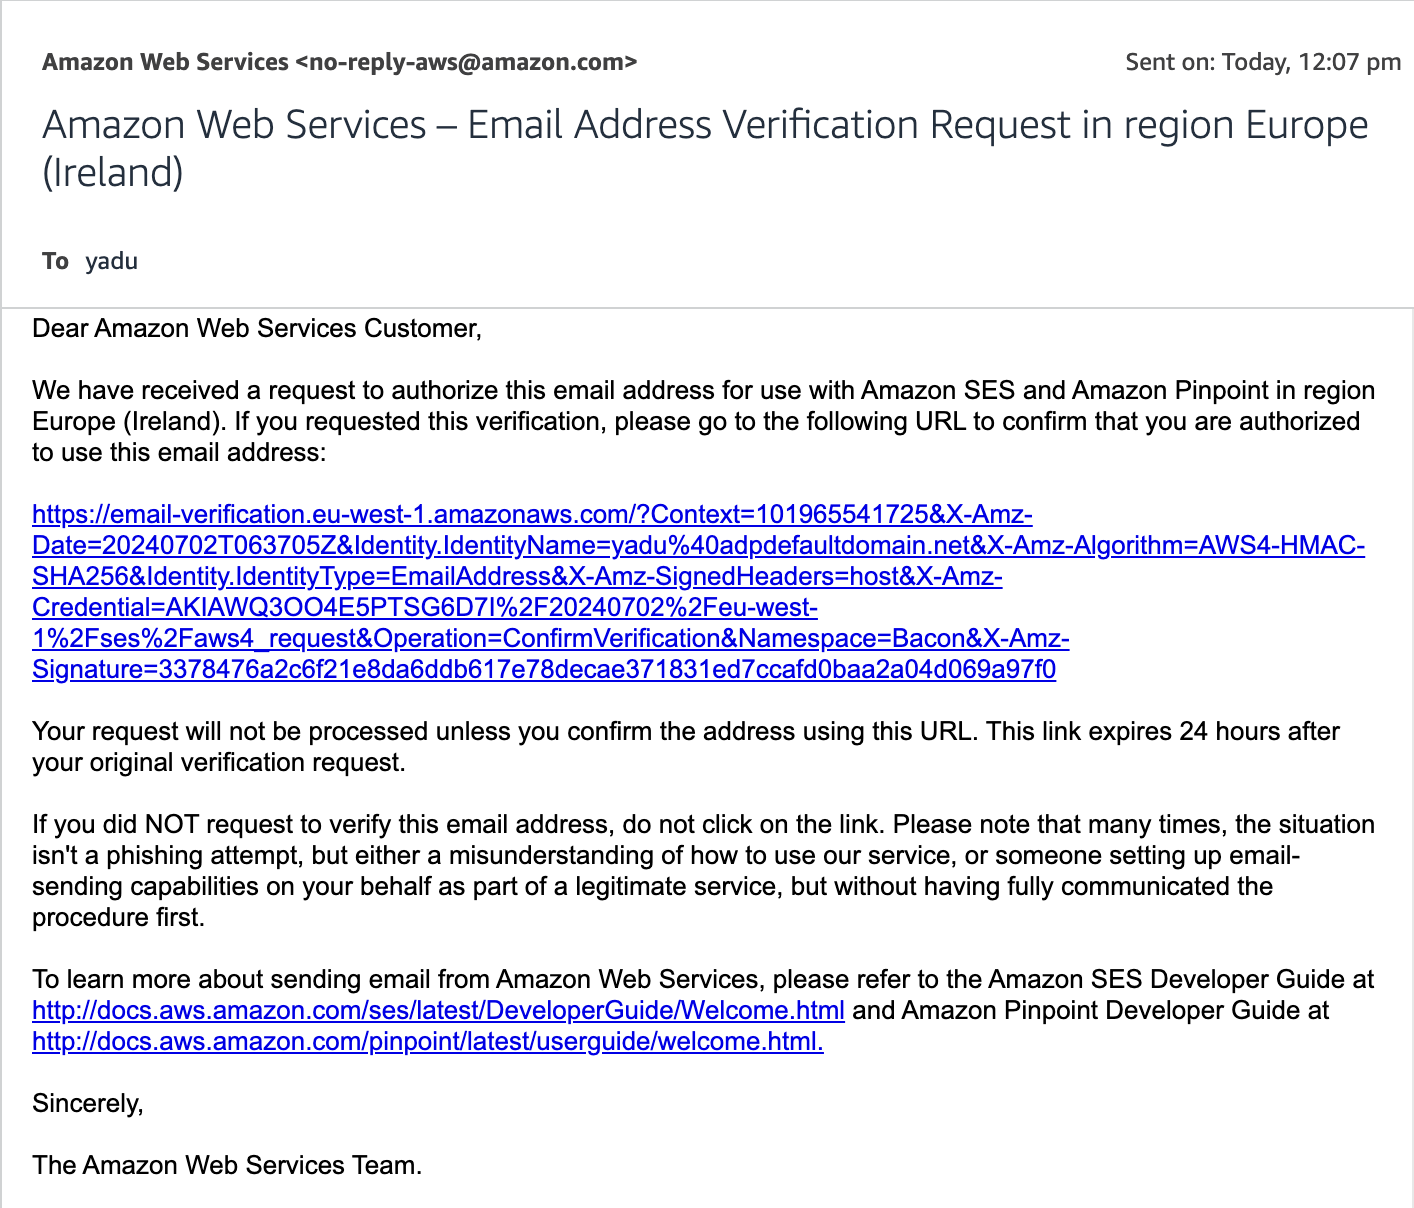
Verifying an email connections is a two-step process. Firstly, the user needs to verify the email address used for creating the connection. This can be achieved by going to the verification email received from Amazon SES and clicking on the link provided :

Secondly, the user needs to verify the email domain. This is done by updating the TXT record in the DNS configuration of the email domain. This record will be available on the connection details page :

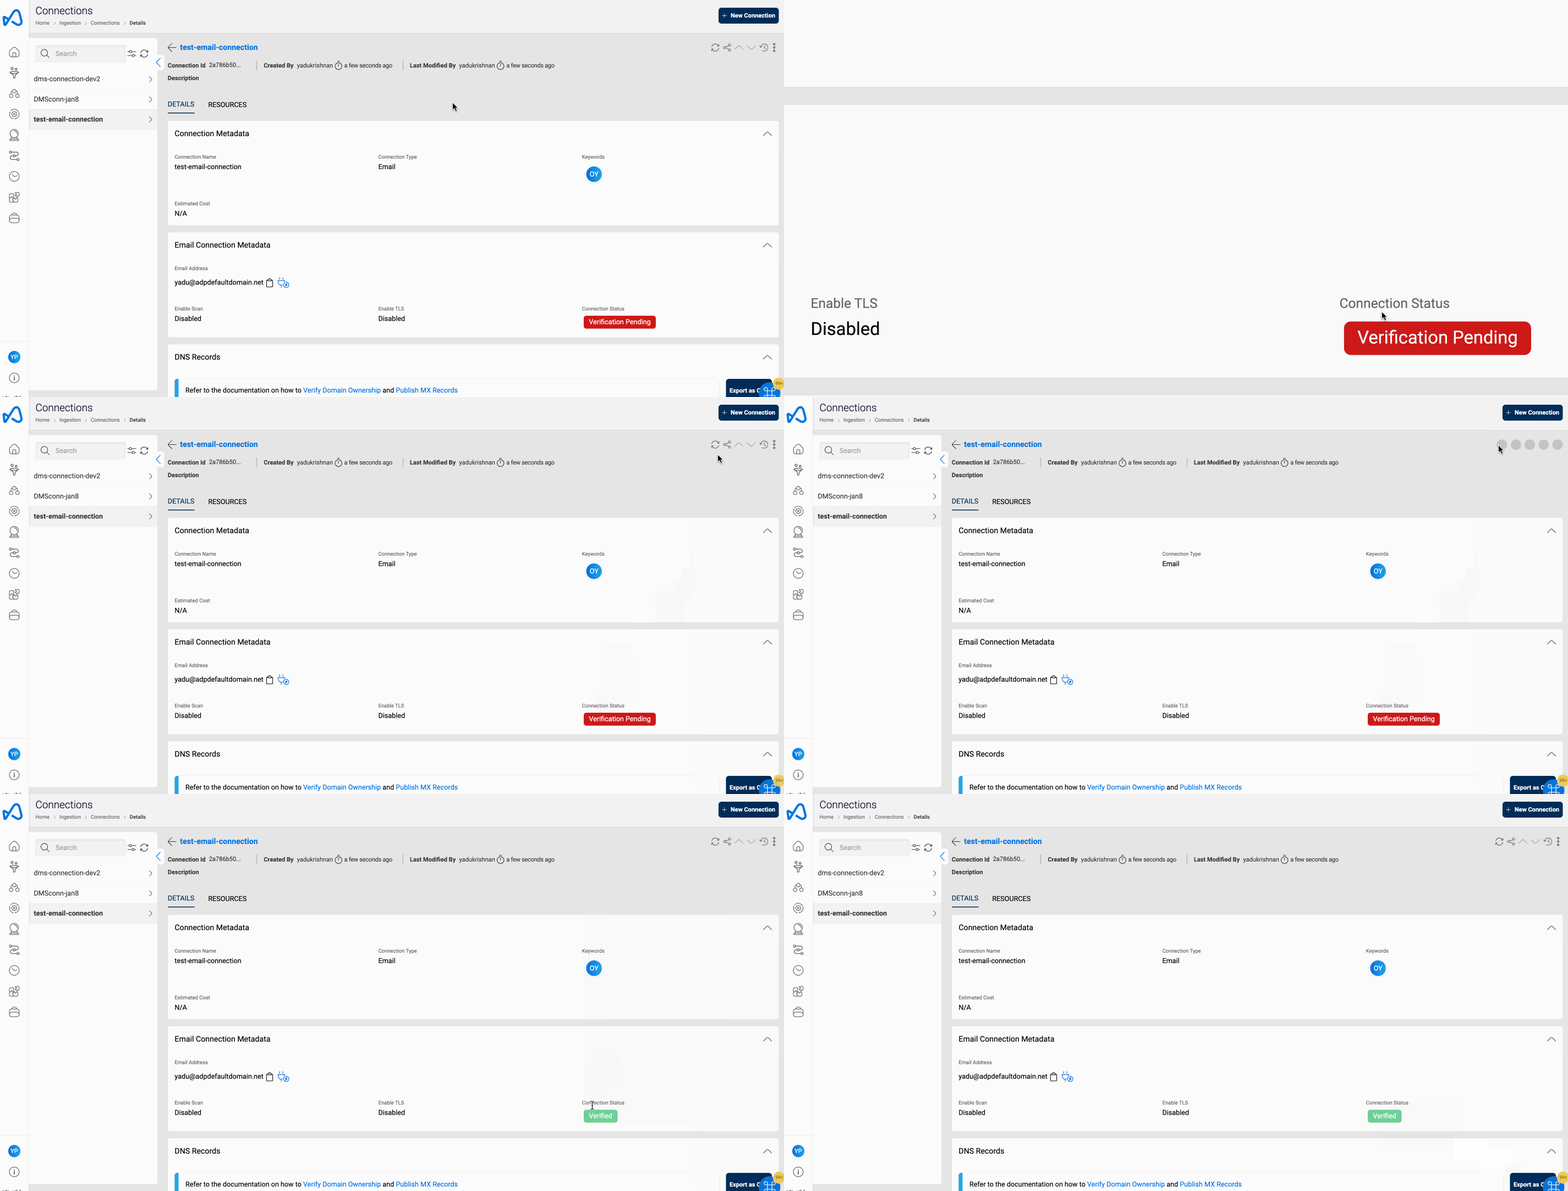
Once the above mentioned steps are carried out, you should be able to see that the verification status of the email connection changes to Verified upon refreshing the details page :

Multiple email connections cannot be created using the same email address.
Updating DNS Records
DNS records (aka zone files) are instructions that live in authoritative DNS servers and provide information on how to handle requests for that domain. DNS records are of several types, but when it comes to email ingestion we are focusing mainly on two types of records :
- TXT Record : as discussed in the previous section, TXT record determines domain authenticity and helps veridy domain ownership.
- MX Record : mail exchange (MX) records determine how email messages should be routed in accordance with the Simple Mail Transfer Protocol (SMTP).
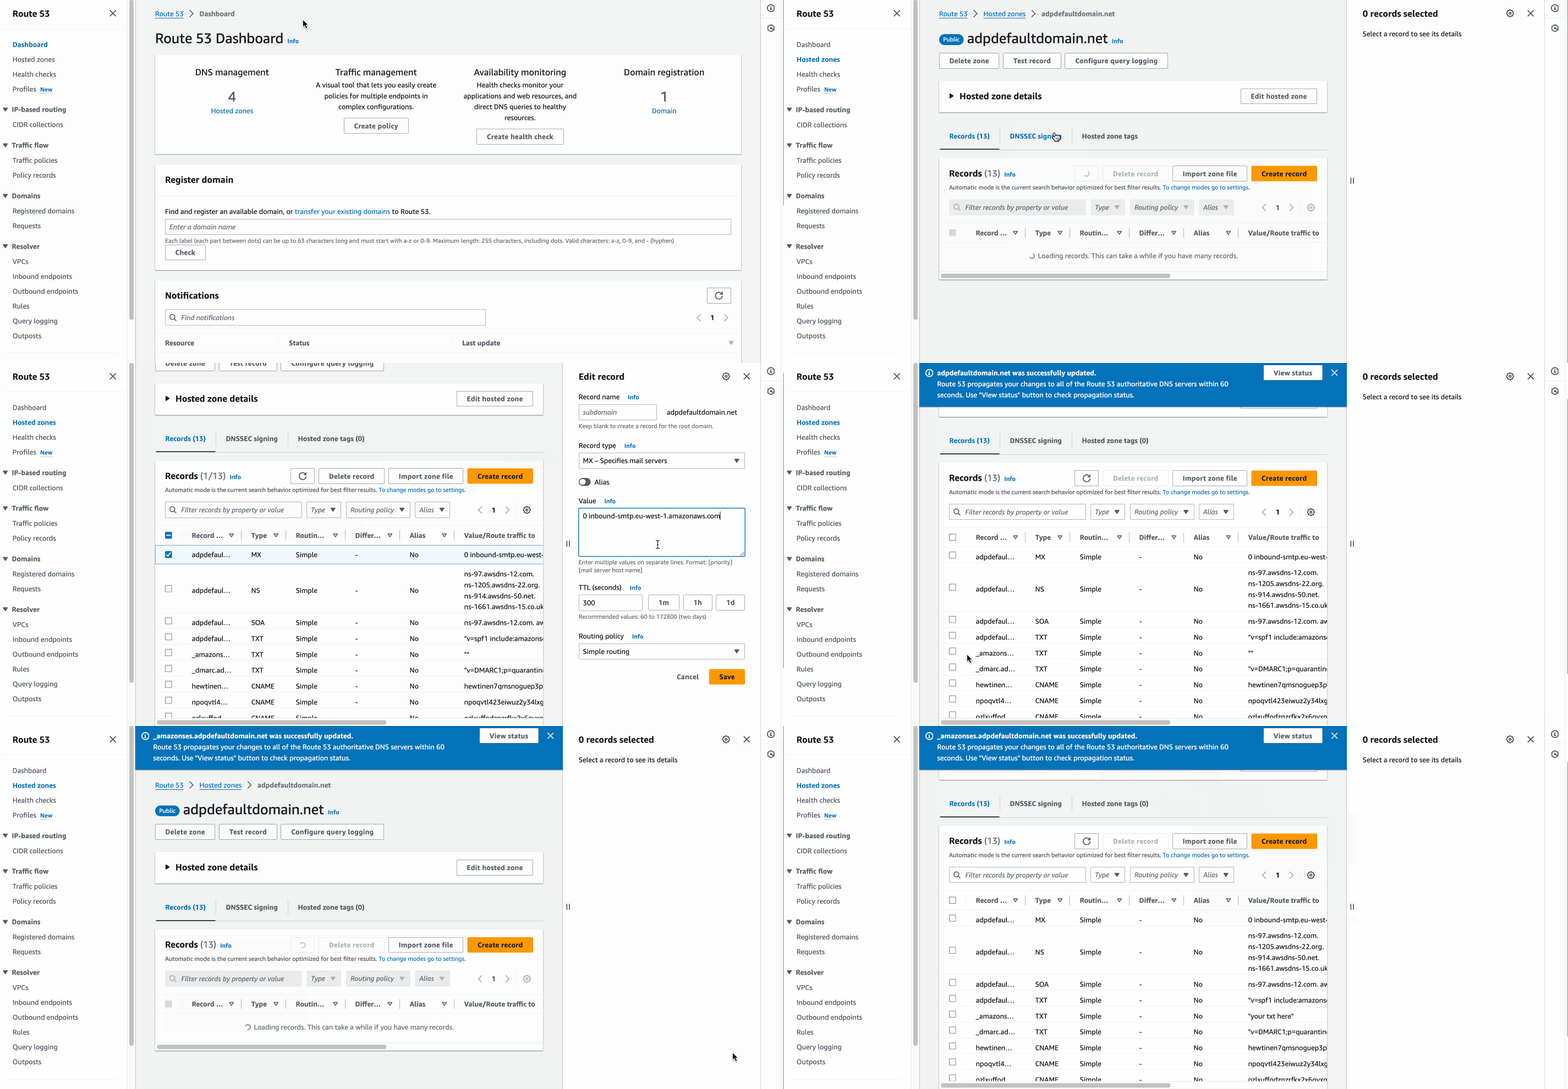
The necessary DNS records for email ingestion will be available on the connection details page. The process of updating the DNS records varies largely depending on your DNS provider. However, the overall flow remains the same. Here is an example on how you can update the DNS records on Amazon Route53 :

Usually DNS changes will propagate within a few minutes, but in some cases it can take up to a few hours for everything to propagate across the Internet. Many things affect propagation time, including your TTL and your domain's registry and TTL.
- Keep in mind that if you were to create another connection using the same email domain, first you will need to update the MX record to point it back to the domain's mail server so as to receive the verification mail from SES. We would recommend creating new MX records rather than overwriting the existing one and assign priorities (0, 10, 20, etc.) so that each time you can just set priority 0 to the record you want the emails to be routed to.
- It is recommended to use a dedicated domain/subdomain for email ingestion so as to not disrupt the general flow of email communications for your primary email domain.
Test Connection
This functionality allows users to quickly verify the correctness of the provided email address. By initiating this test, users can confirm whether the email address provided is correct and the DNS configurations made are functional, ensuring seamless redirection of the emails.

Data migration to Amorphic
To migrate data to Amorphic, users must create a new Dataset. They should select the Connection Type as 'Email' and subsequently choose the Email connection from the provided drop-down list. During dataset creation, users are restricted to choose FileType as 'others' and target location as 'S3'.
Moreover, additional parameters can be provided if required. The allowed parameters are:
- EnableBodyExtraction: Enables or disables the extraction of email body content. It accepts 'yes' to enable or 'no' to disable. This functionality exclusively extracts text content from the body of the email and does not include elements such as inline images, embedded videos, formatted text styles, etc.
- BodyFileType: Specify the file type for the extracted email body. Users are provided with the option to select from JSON, TXT, or PDF formats. In cases where no file type is explicitly provided, the default setting will use JSON format.
- AllowEmailsFrom: Filter to allow emails only from specified email addresses.
- ExcludeEmailsFrom: Filter to exclude emails from specified email addresses.
- AllowEmailDomains: Filter to allow emails only from specified domains.
- ExcludeEmailDomains: Filter to exclude emails from specified domains.
- AllowFileTypes: Filter to allow only specific file types for the dataset.
- ExcludeFileTypes: Filter to exclude specific file types for the dataset.

Additional Parameters can be modified or removed while editing the dataset.
After successful dataset creation, the user can send emails to the email address and the attachments would be ingested to the dataset.