Agents
Agents orchestrate interaction between users and foundation models to carry out actions or accomplish tasks. Agents extend foundation models to understand user requests and creates an orchestration of the tasks it needs to perform. Agents in Amorphic are made up of three components:
- Agents: The Agent is configured with a base model to use and instructions on what task it is designed to performed.
- Action Groups: An action group is responsible for the actual action taken. It contains the API definition and the business logic to be executed.
- Libraries: A library consists of packages that are needed for action groups.
How to create an Agent?
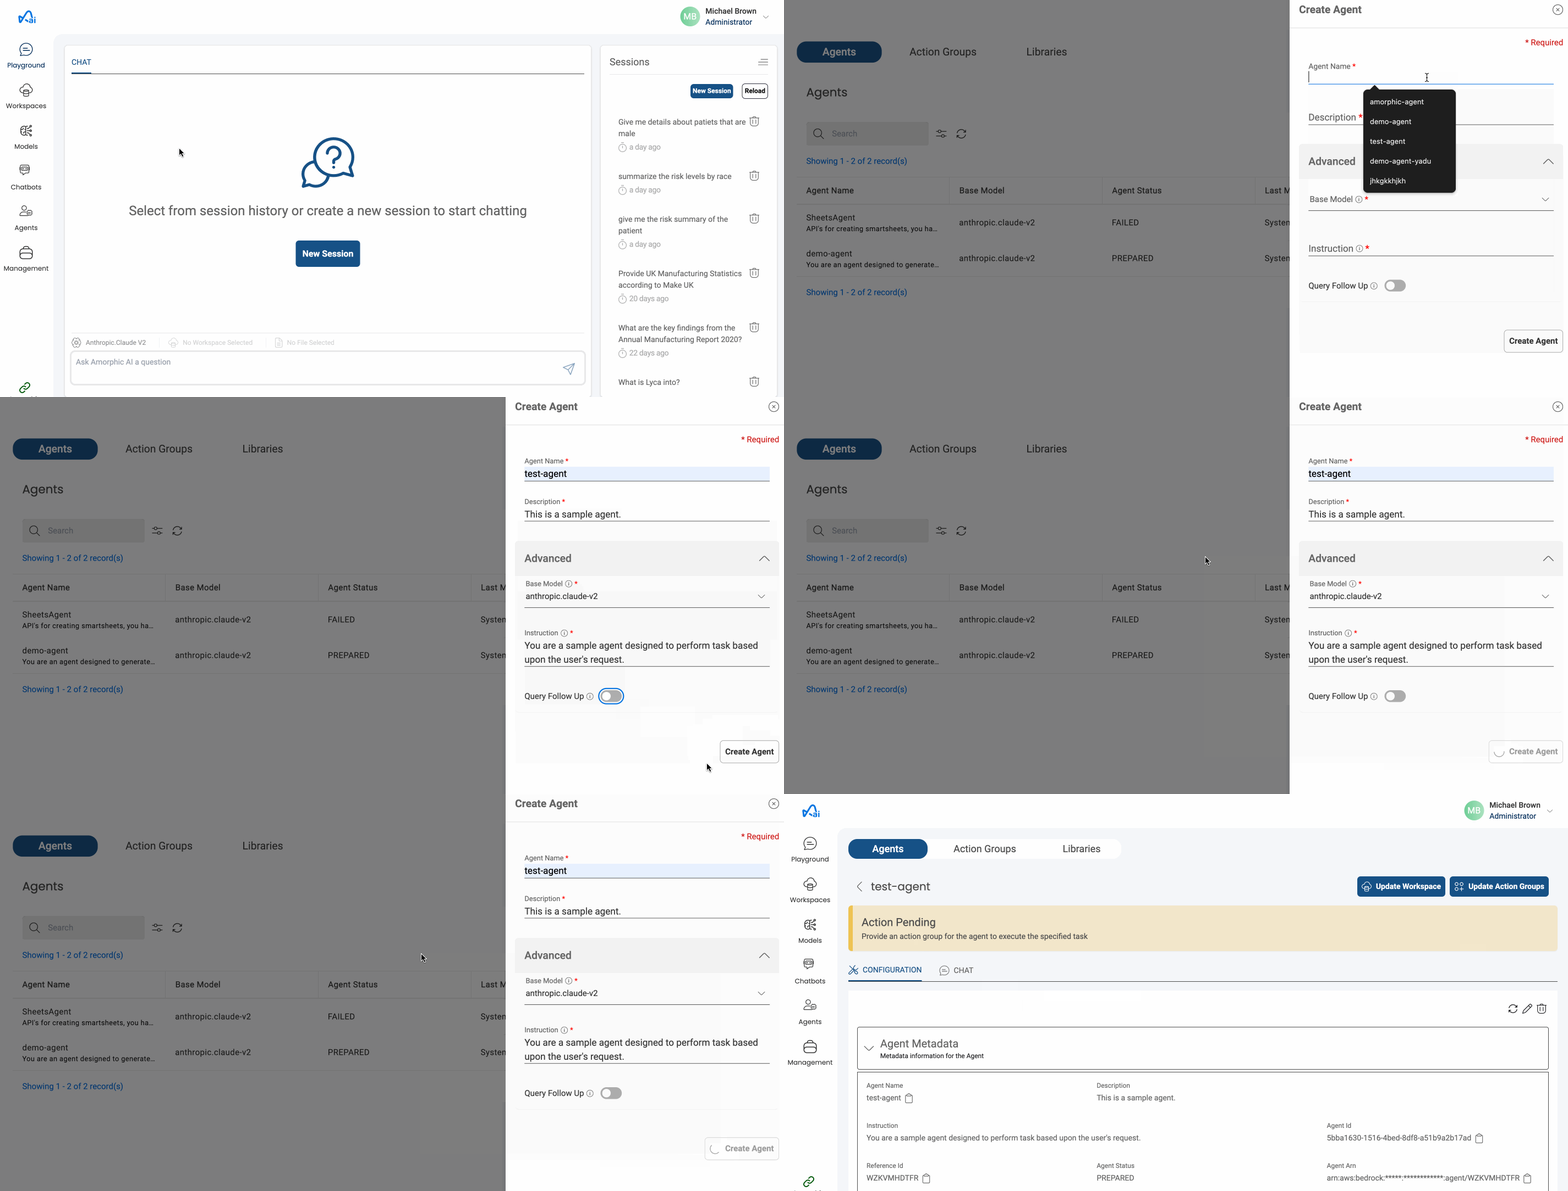
- Select Agents tab from the services in the left navigation pane and click on
+ New Agent - Fill in the required fields (details listed below) and click on
Create Agentbutton.
Following fields are needed to create an Agent:
| Properties | Details |
|---|---|
| Agent Name | A name for the Agent. This should be unique across the platform. |
| Description | Description of the Agent being created. |
| Base Model | The base model to use for generating embeddings. |
| Instruction | Input languages of documents. Currently only English is supported |
| Query Follow Up | Enabling this option allows the Agent to prompt additional information from the user. |
Below image shows how to create a new Agent
Make sure that the base model used to create the Agent is enabled from the models page.
Interacting with an Agent
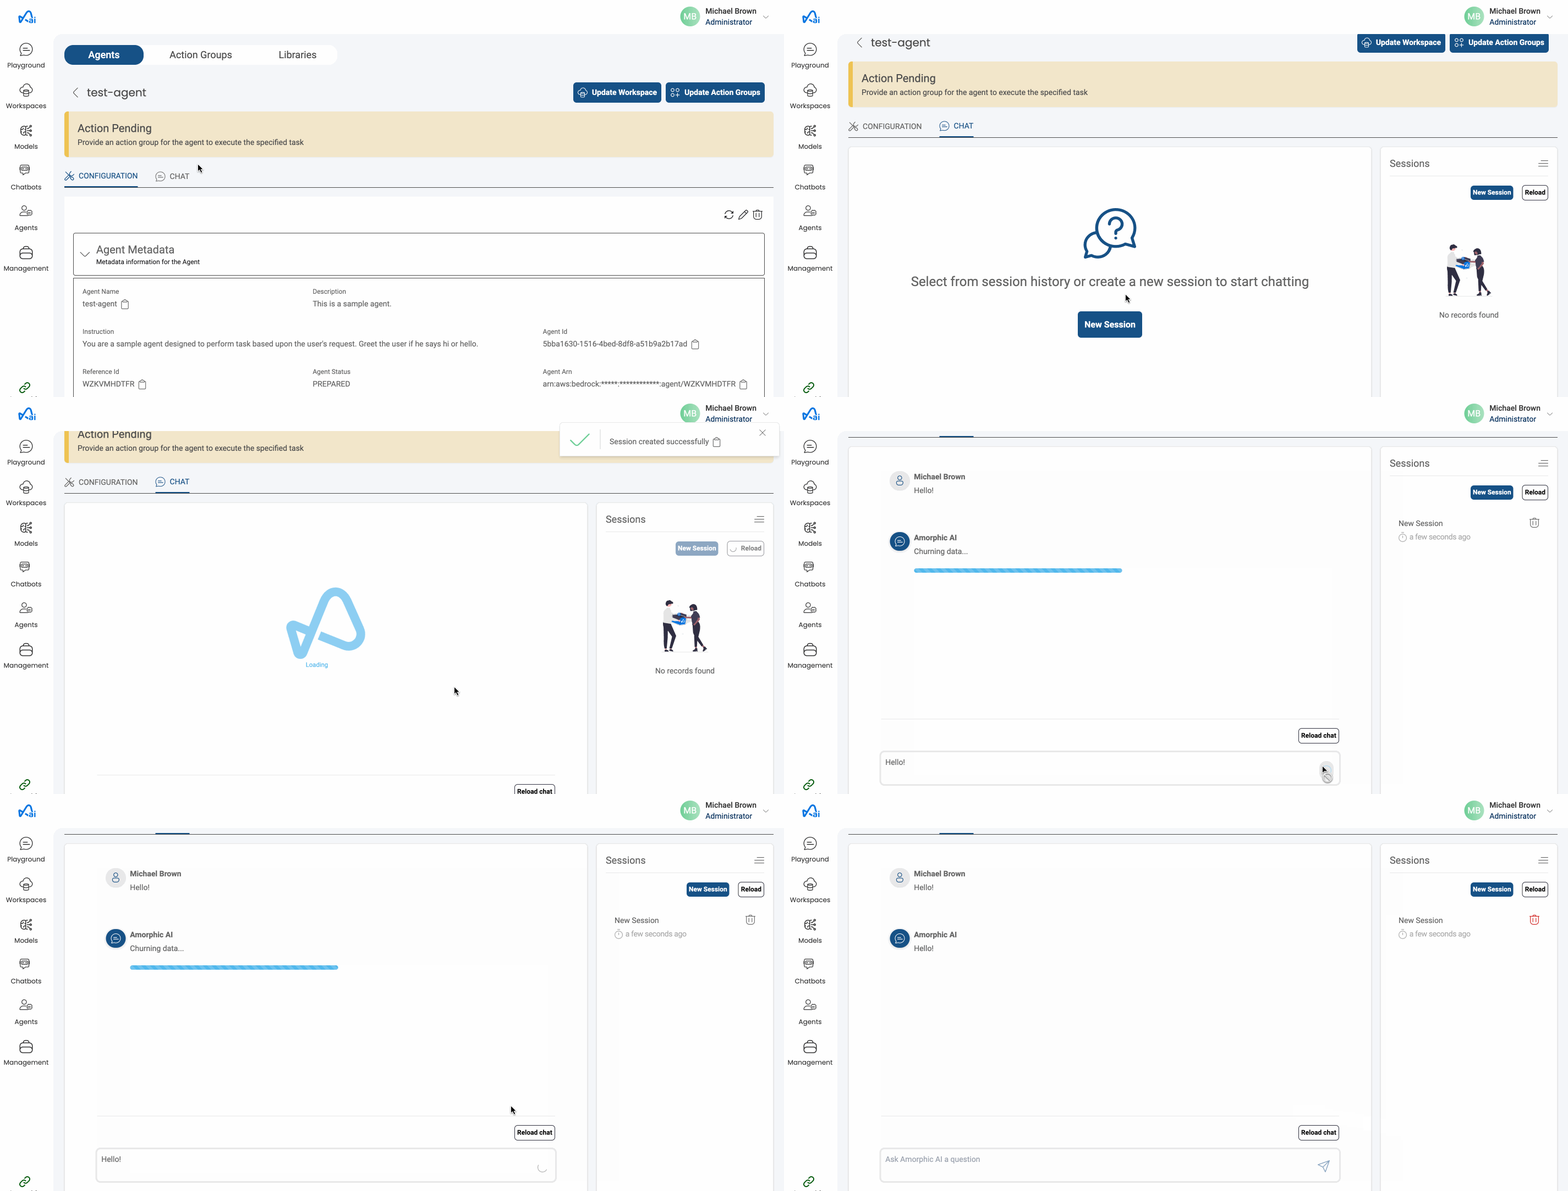
Users can interact with the Agent in Amorphic by heading to the Chat tab (right next to the Configurations tab).
Users can either create a new session or select an existing session from which the Agent will be able to pull chat context from.
Below image shows how to interact with an Agent
By default an Agent session will be valid only upto one hour.
Attaching action groups to an Agent
Users can also associate action groups to an Agent to execute a specific set of tasks.
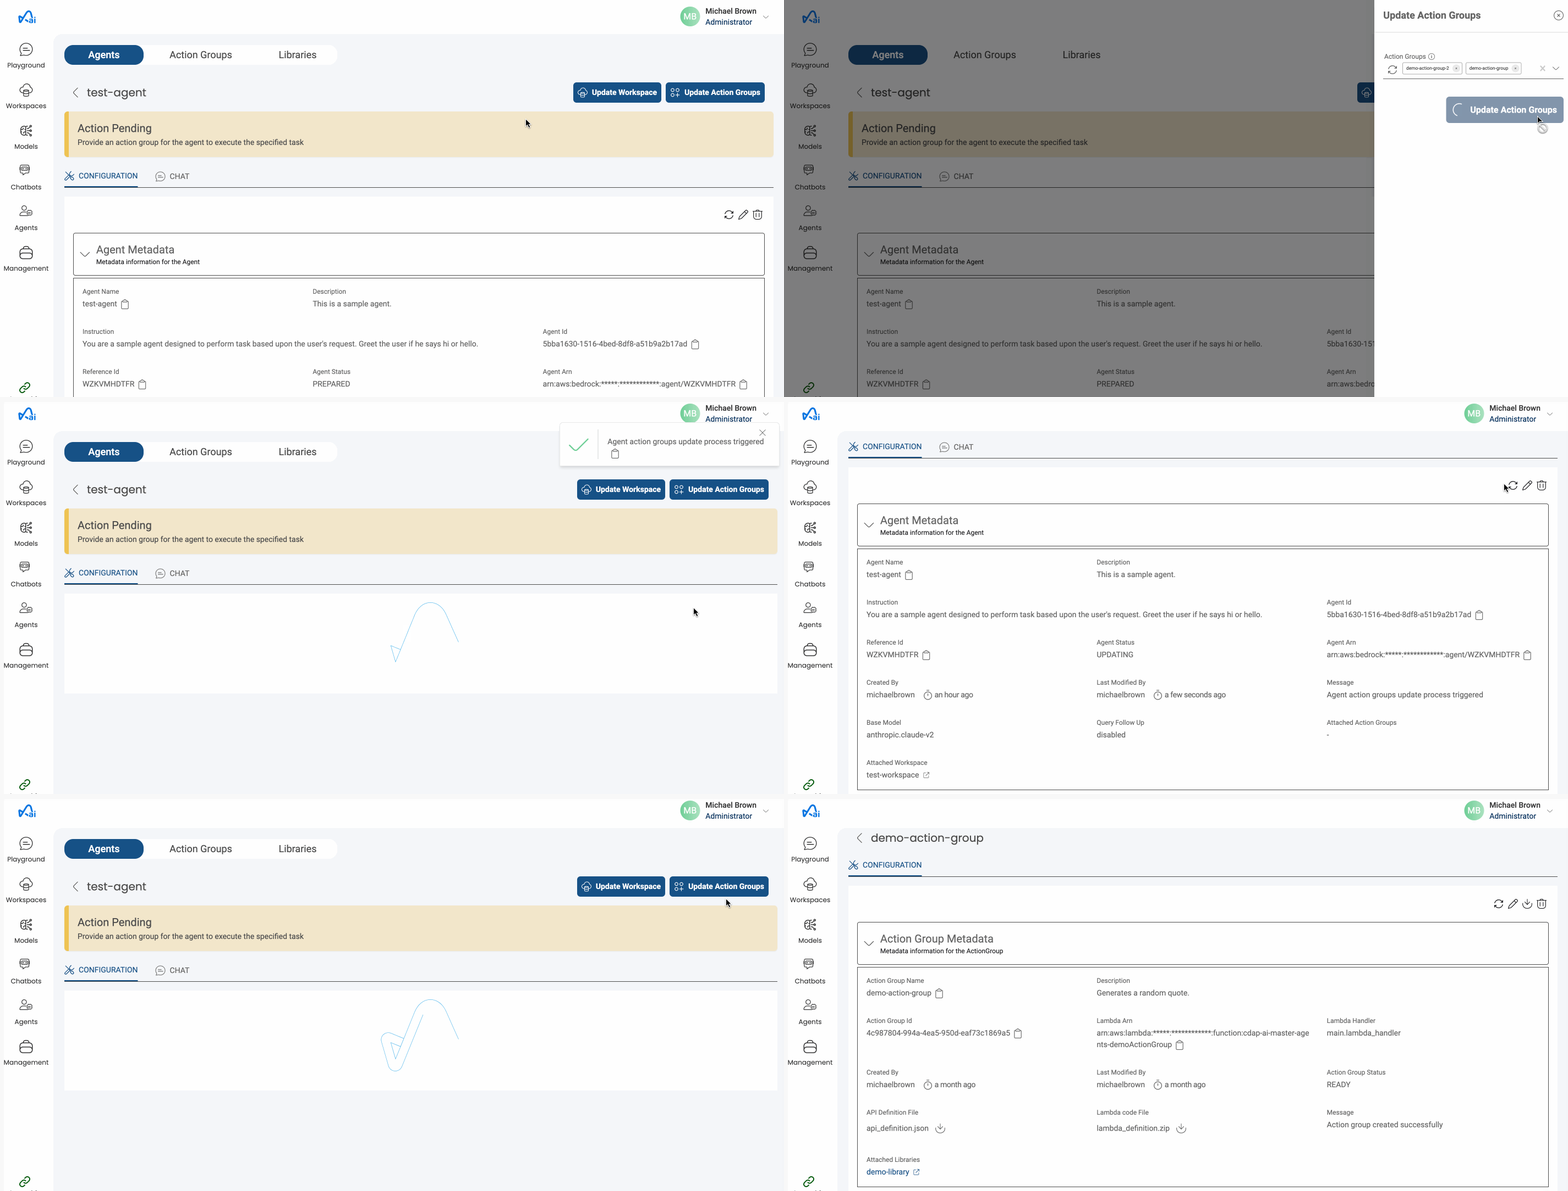
To attach action groups to an Agent, click on the Update Action Groups button and select the action groups from the drop down.
Users can attach multiple action groups to a single Agent.
Below image shows how to attach action groups to an Agent
Attaching a workspace to an Agent
Users can now associate a workspace to an Agent and retireve context from the workspace during consumption from the Agent chat, or via a custom logic defined in the action group lambda.
To attach a workspace to an Agent, click on the Update Workspace button and select the workspace from the drop down.
Currently only one workspace can be attached to a single Agent.
Below image shows how to attach a workspace to an Agent
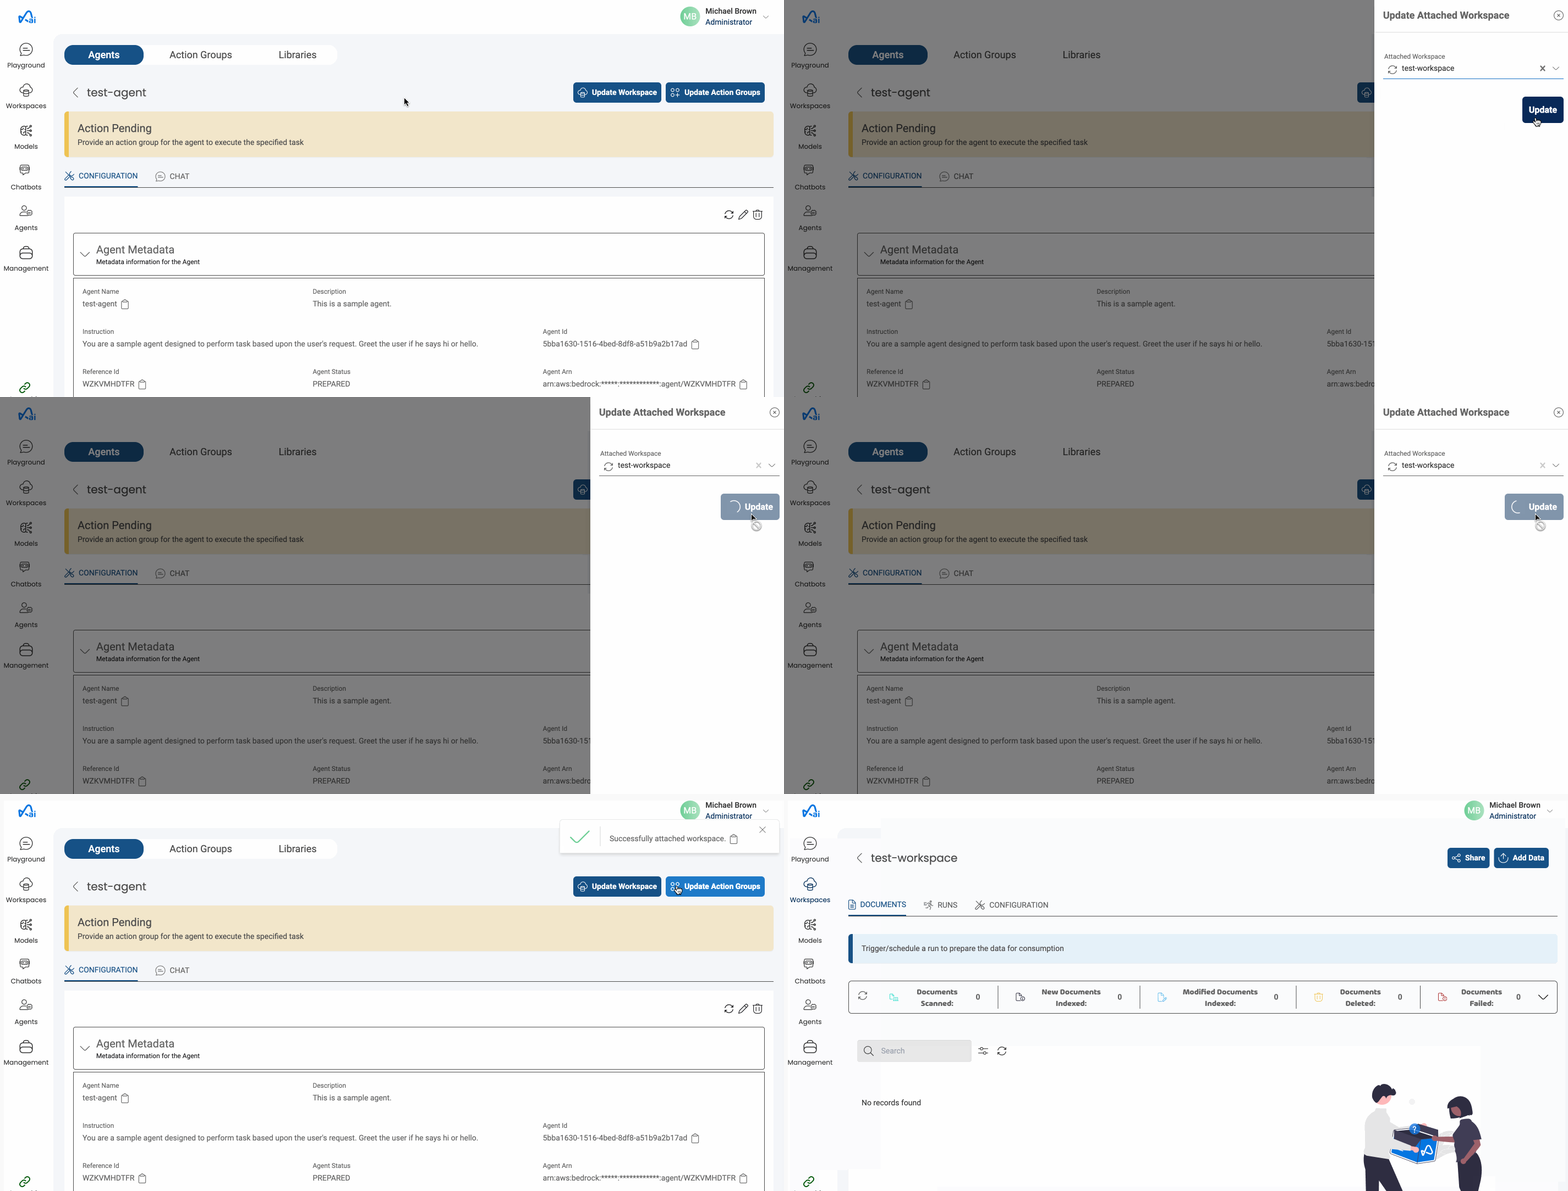
Only workspaces in ACTIVE status can be attached to an Agent.
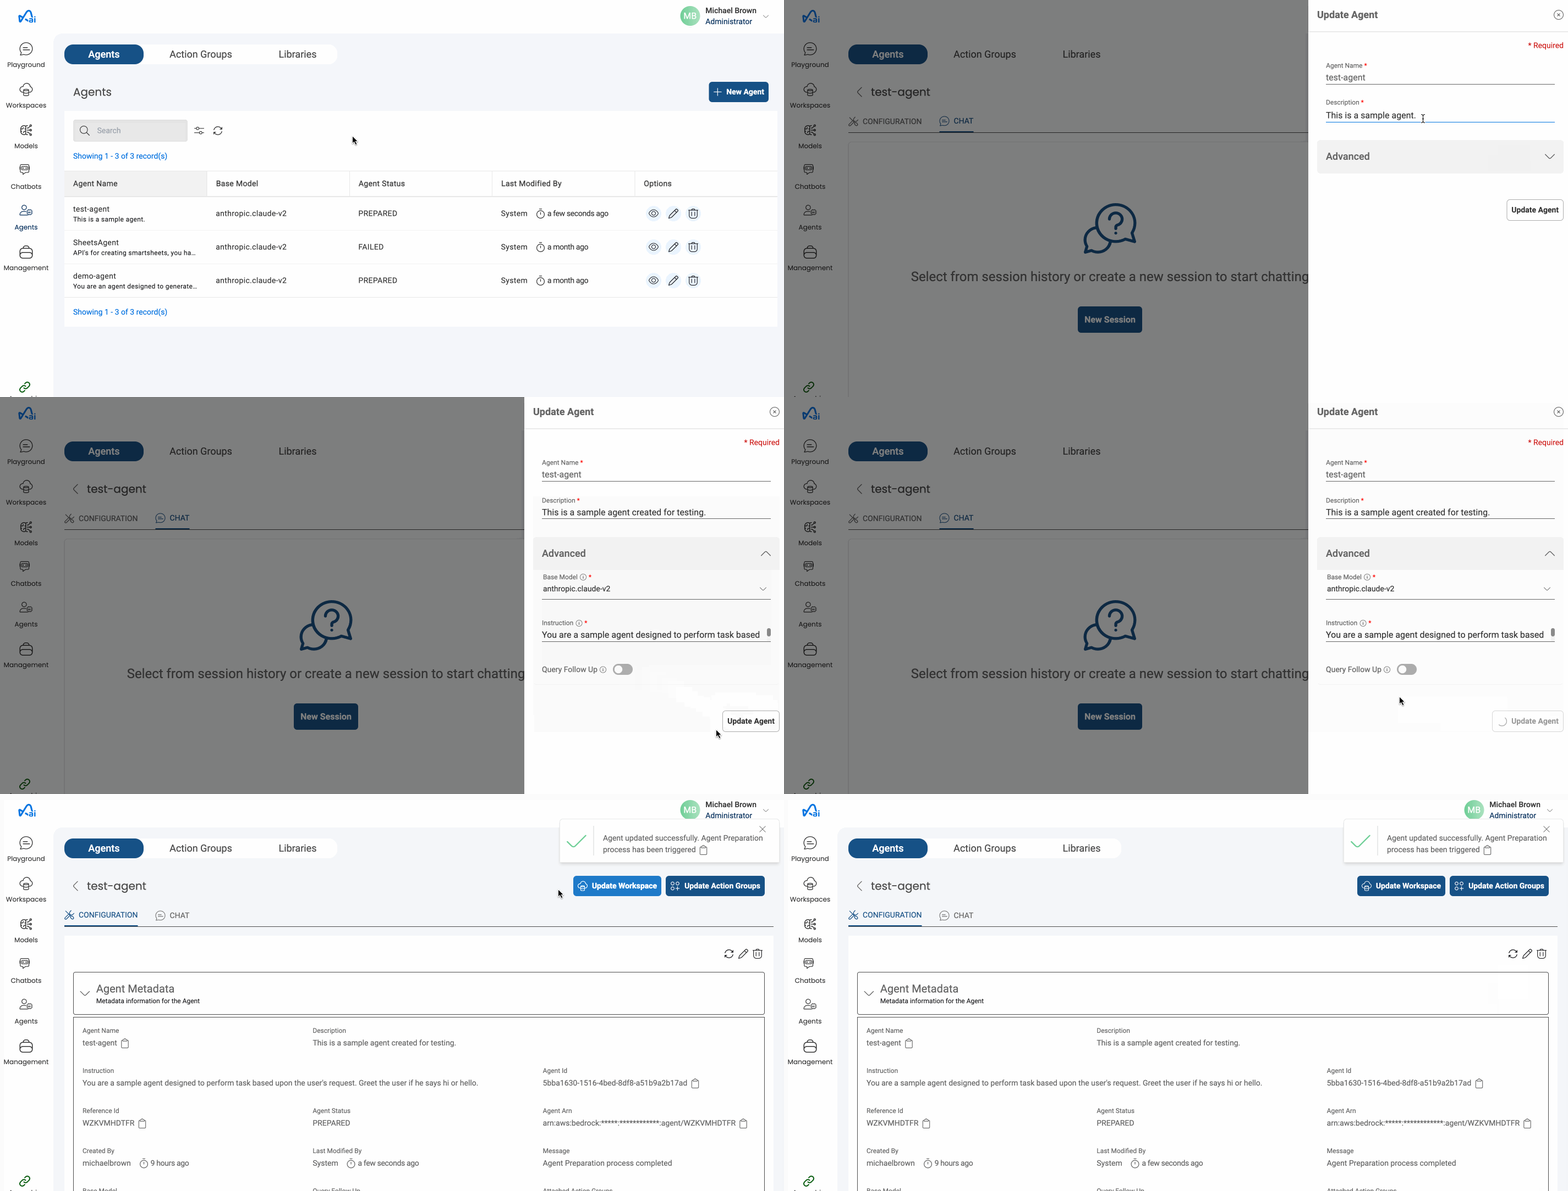
Updating Agent details
Users can also update the Agent configuration after creation.
- Select the Agent you want to edit and click on the
Configurationtab. - Click on the edit icon in the Metadata section and update the required details then click on
Update Agentbutton.
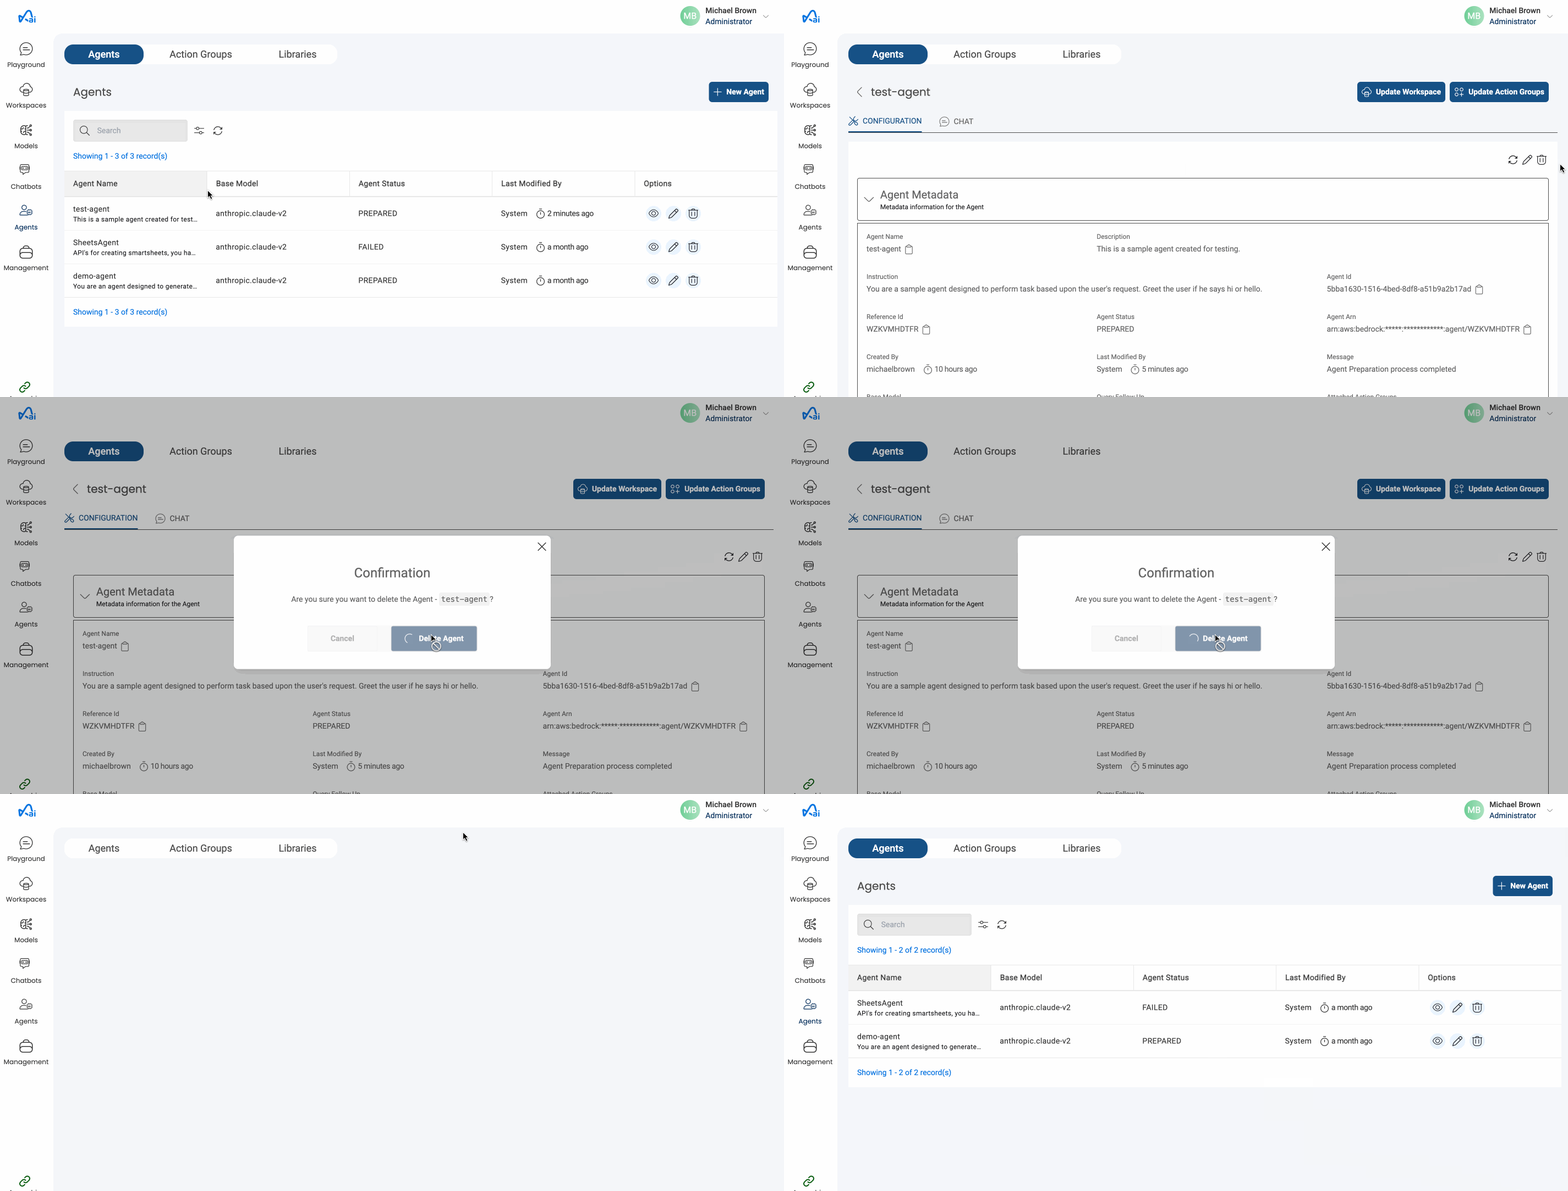
Below image shows how to attach action groups to an Agent
Deleting an Agent
- Select the Agent that you want to delete and go to
Configurationtab. - Click on the delete icon in the Metadata section and click on the Delete Agent button to confirm the deletion.
Below image shows how to delete an Agent
